External servers are third-party websites (e-learning, a faculty website, an intranet) on which a player embedded from our portal is allowed to run. In this agenda we keep their list; authors then choose from it for a media file in the protected mode where it may be played — see Display on an external server. We open the agenda from the menu with Portal administration → External servers.
The list of servers
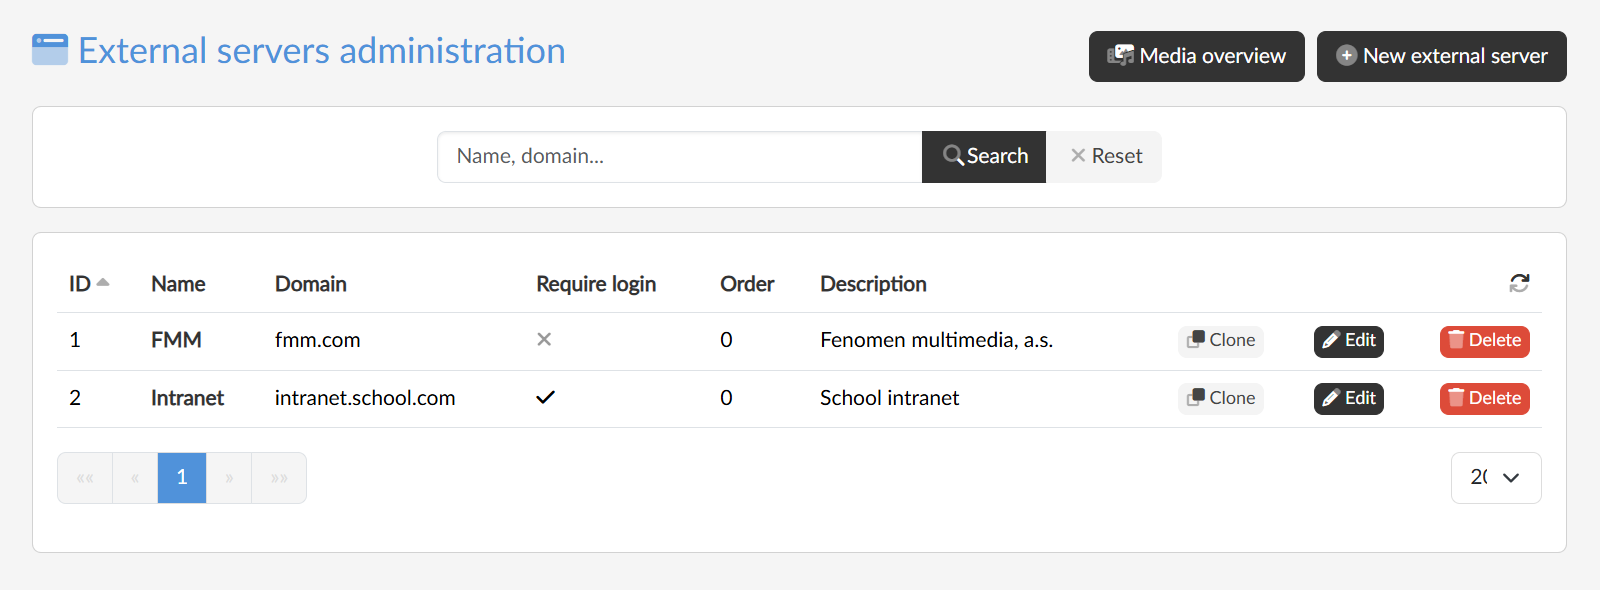
The table shows the ID, name, domain, whether the server requires login, the order and the description. We search by name or domain, and clicking a column header sorts the list. With the Media overview button we go to the list of media that allow external playback.
Creating and editing a server
With the New external server button we enter a name; the server is created and the External servers editing dialog opens straight away, where we fill in the rest. We open the same dialog later by clicking the name or with the Edit button.
- Name — the name under which authors see the server when choosing it for a media file;
- Domain — the address of the website from which playing is allowed;
- Require login — see below;
- Description and Order — a note for us and a number for sorting.
With the Clone button we create a copy of the server — useful for several similar domains. With the Delete button we remove the server after confirmation; the media that had it allowed stop playing on it.
Require login
The option determines how a protected media file behaves on the given server:
- off — the media file plays on the allowed server for anyone who opens the page. The other protection rules of the media file (organisations, IP addresses, user lists) do not apply here — access is handled by the external website;
- on — the viewer has to log in to our portal in the player, and the media file plays only if they also meet the other protection rules of the media file.