The Users agenda is where we manage the accounts that have access to the portal — we create new users in it, add users who already exist elsewhere on the platform, import them in bulk, and from here we go to the user detail, where we set their roles. We open it from the menu with Portal administration → Users.
The list of users
We can narrow the list by role, by the list of users the user belongs to, and by searching by name, surname, login name or e-mail. The Reset button returns the filters and sorting to their default state.
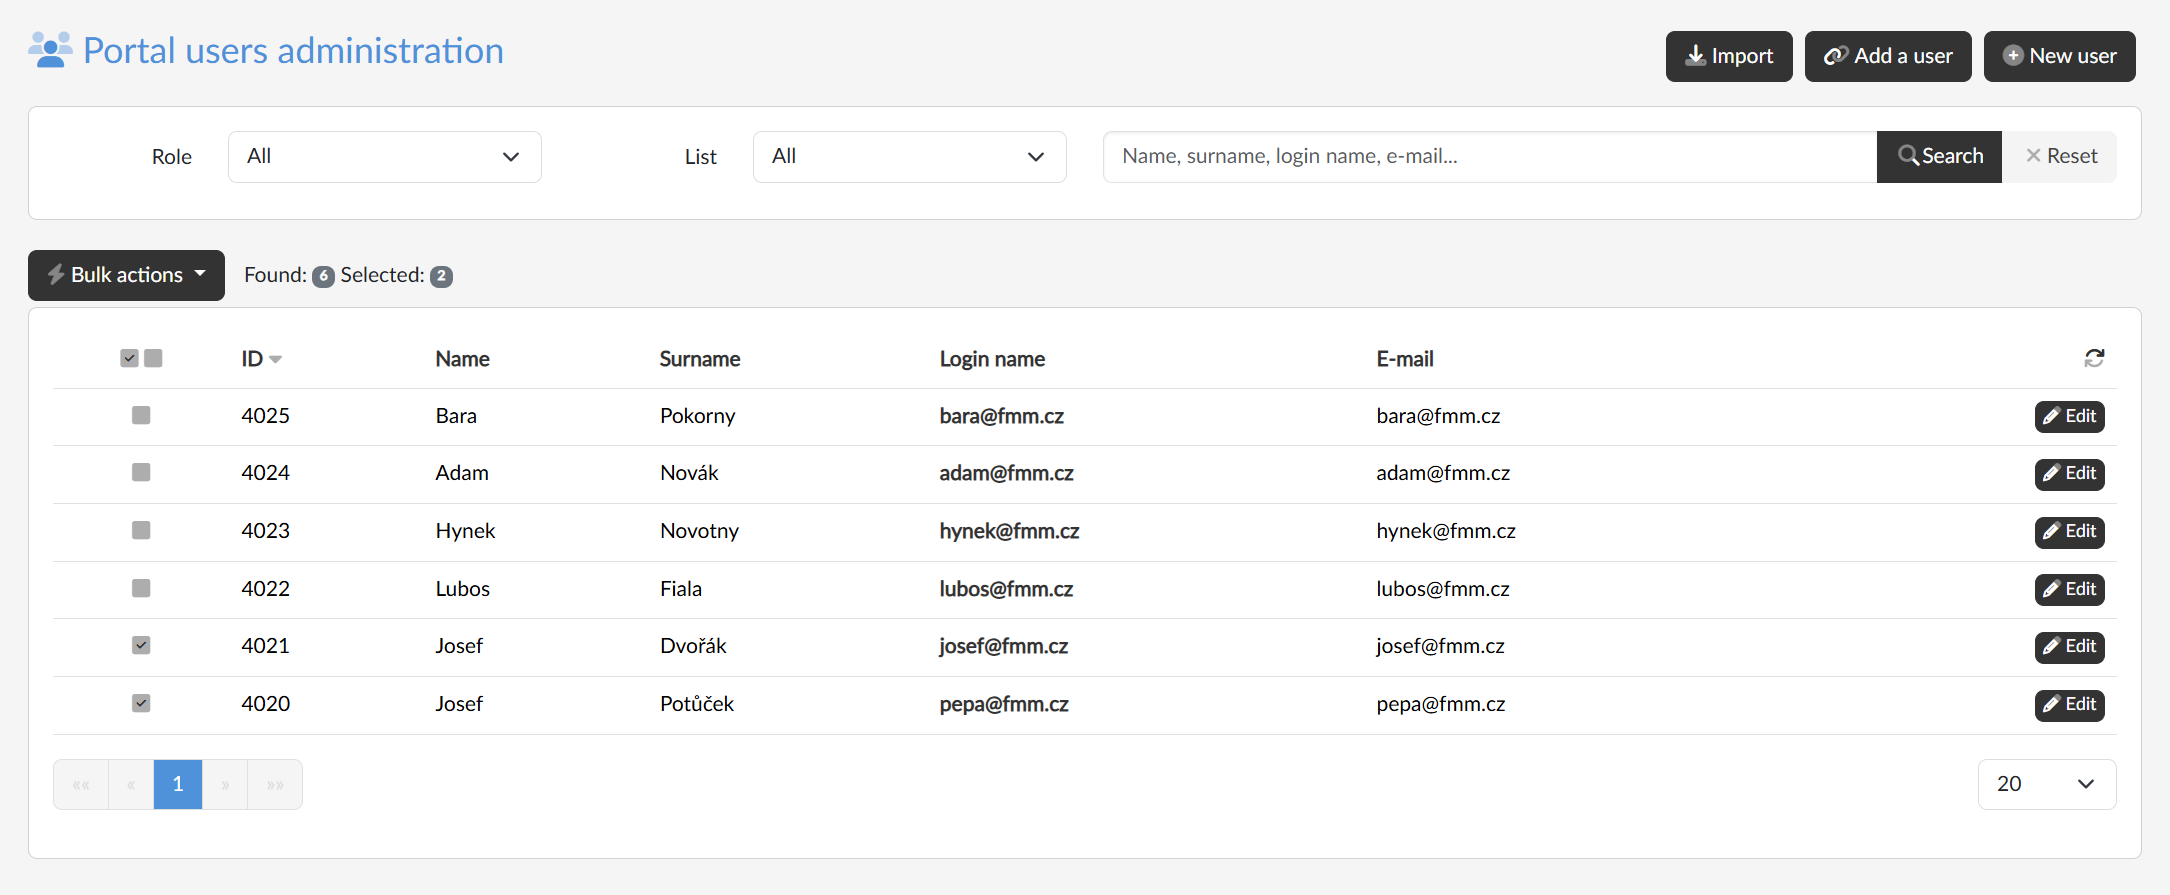
The table shows the ID, name, surname, login name and e-mail; clicking a column header sorts the list. Clicking the login name or the Edit button opens the user detail.
New user
With the New user button we create an account manually. We fill in the name, surname, login name, e-mail and password — all the fields are required. The login name and the e-mail must be unique across the whole platform. The new user gets their roles only in the detail.
Adding an existing user
With the Add a user button we add to the portal a user who already has an account elsewhere on the platform. In the dialog we enter their full login name or e-mail, click Search and then Add next to the account found. The user's login details do not change.
Importing users
We create a larger number of users at once with the Import button:
- With the Download the xlsx file template link we download an empty table and fill it in — one row is one user.
- We select the completed file in the upload field. The application checks it straight away and lists the result row by row.
- Optionally we select a user list that all the imported users should be added to.
- If the check found no errors, we confirm with the Import button.
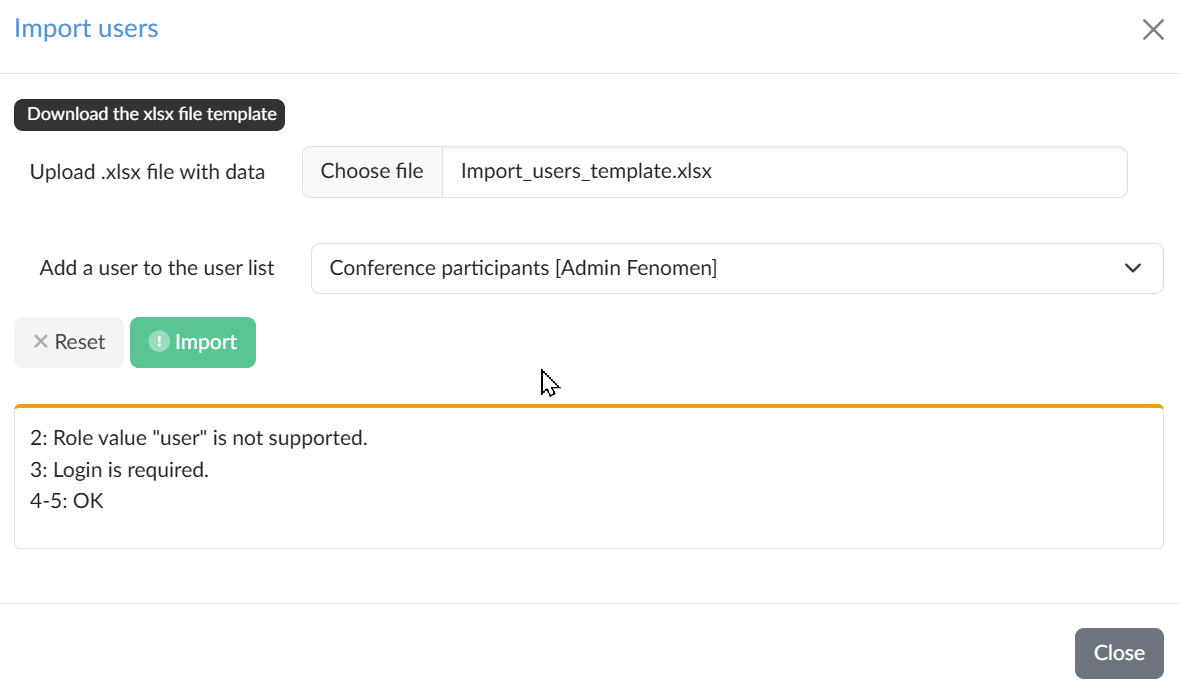
Columns of the template:
- Provider — the login method: internal (default) or shibboleth;
- Login, Name, Surname, E-mail — required details;
- Role — a comma-separated list of the values registered, editor, redaktor, admin.
Bulk actions
We select users with the checkbox at the beginning of the row, or all users on the page with the icon in the header. A Bulk actions menu then appears above the table, which we use to add the selected users to a user list or to remove them from it. The lists themselves are managed in the User lists agenda.
Invitations
In invitation mode we do not enter a password for a new user — they set it themselves via the link in the invitation e-mail. The agenda is then extended:
- above the filters there are three counters: users without invitations, invitations sent and invitations accepted;
- an Invitation status is added to the filters and to the table (Not sent, Sent, Accepted);
- Send invitation is added to the bulk actions; a user who has already received an invitation gets it again;
- the import dialog gets options whether to send an invitation to new users and whether to existing users;
- with the Invitation templates button we edit the text of the e-mail separately for new and for existing users. In the text we can use the placeholders [link], [portaldomain] and [portal].