The Streams agenda makes it possible to plan and run live streaming within the portal. We open it from the menu with Content administration → Streams.
The stream listing
The table listing offers the individual records according to the role of the logged-in user, and sorting and filtering are available
- An editor sees their own records
- A redactor sees their own records and the records of their team of editors
- An administrator sees the records of the whole portal
Above the table there is a search field with the Search and Reset buttons, below it the Status, Protection and Language filters; the portal administrator additionally has the Streamer filter. The table shows the ID, the user, the name, the beginning and the end of the streaming, the status, the type and the protection; clicking a column header sorts the listing.
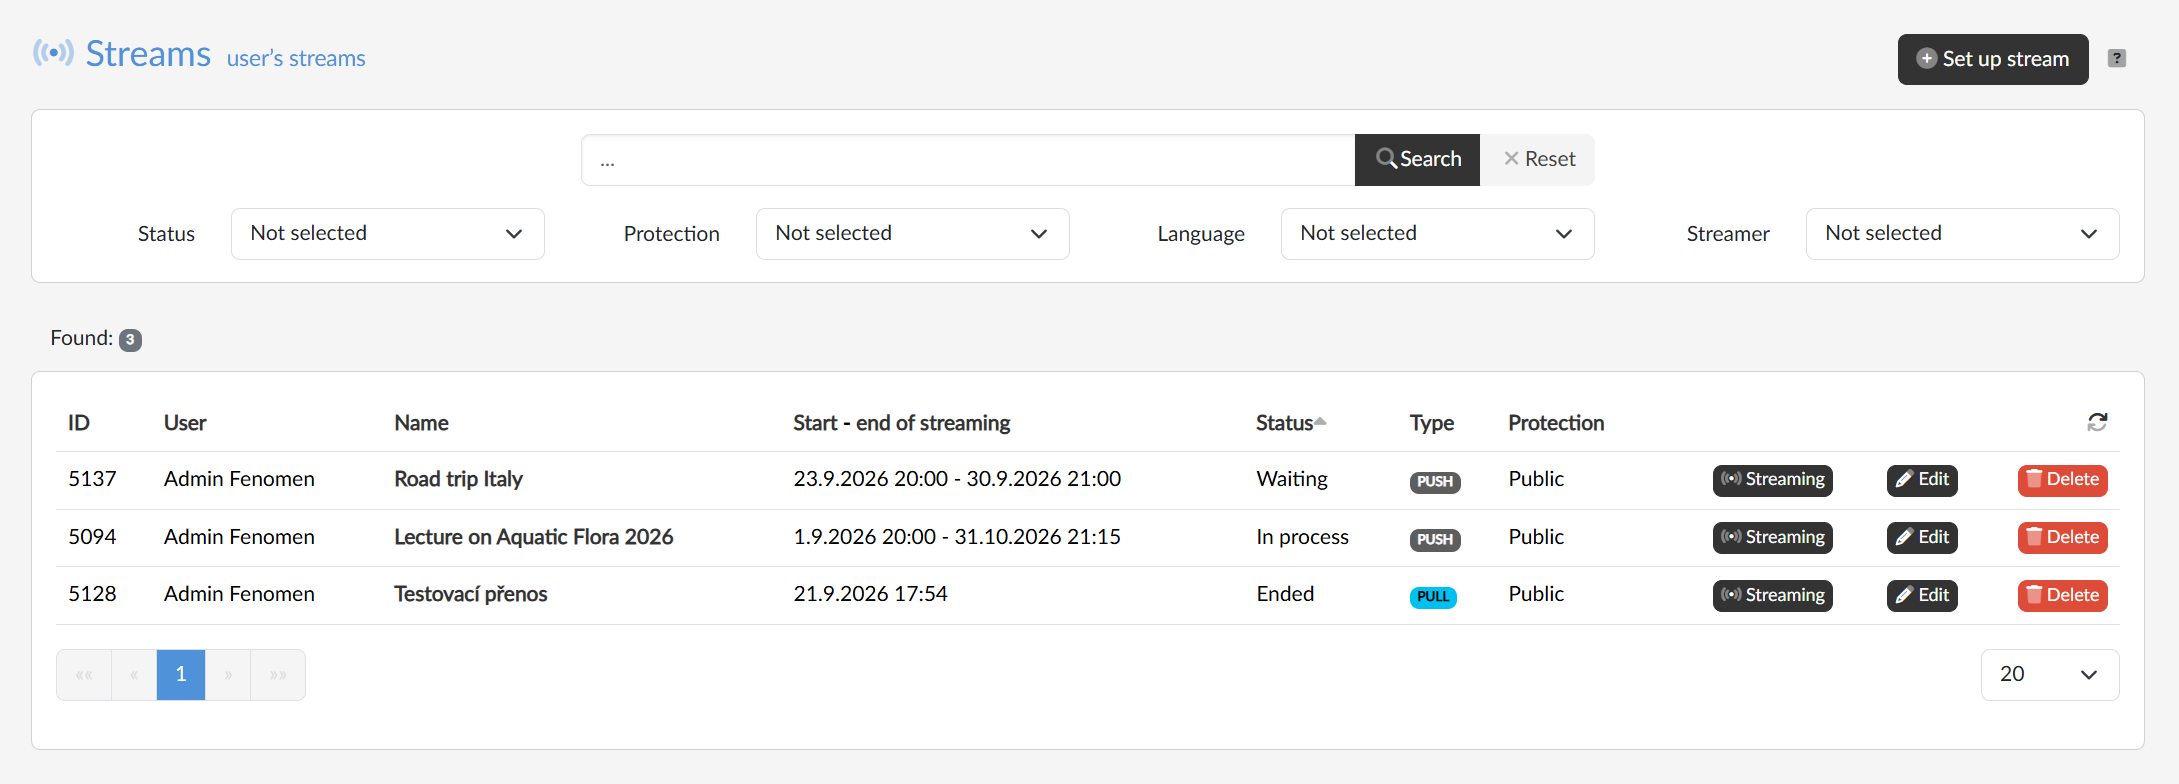
The Type column tells us where the stream takes its picture from:
- PUSH
 — we send the picture to the portal ourselves, from the broadcasting app or from our own streaming software. Every stream we set up manually is of this type.
 - PULL
 — the portal fetches the picture itself from a source system, for example from a recording device in a lecture hall. These streams are set up by the source system, which also controls their broadcasting automatically; in the listing we work with them just like with other streams, only we do not control the broadcasting.
Three actions lead from each row: the Streaming button opens the page with the parameters and the controls of the broadcast, the Edit button (or clicking the name of the stream) opens the detail of the record, and the Delete button removes the record.
Setting up / planning a new stream
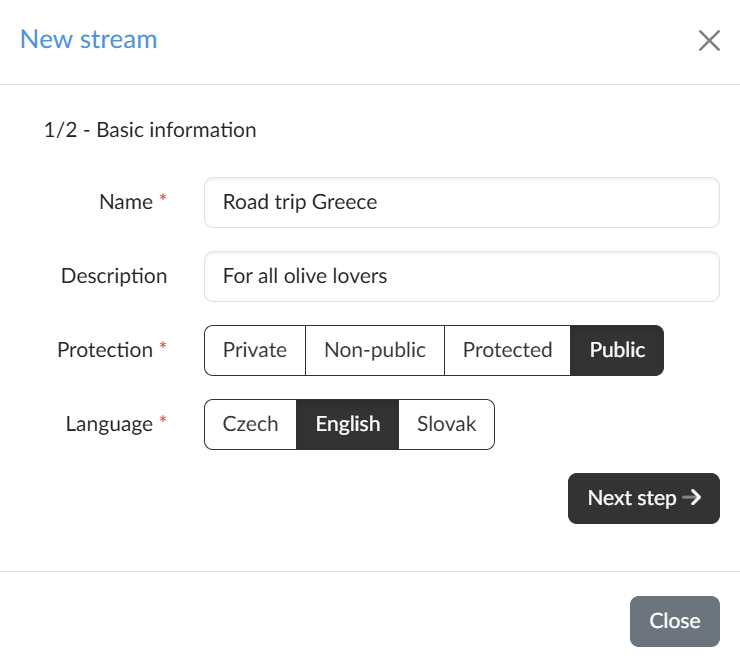
We set up a new stream with a wizard, which we open with the Set up stream button in the top right.
- In the first step we fill in the mandatory name of the stream, and optionally a description, and with the buttons we choose the Protection of the stream and the Language the streaming will be in. Both choices are mandatory.
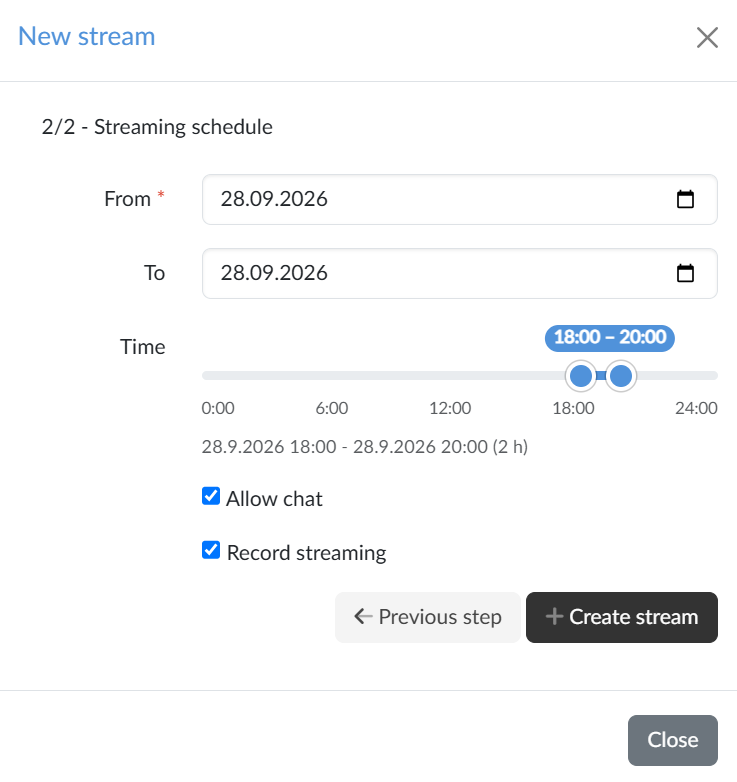
- In the second step we set the Streaming schedule. The wizard fills in today, from the nearest full hour, for one hour. We choose the date of the start and the end in the From and To fields and set the start and end time of the streaming with the Time slider in quarter-hour steps. In this step we also allow chat between the broadcaster and the viewers (Allow chat) and switch on the recording of the streaming (Record streaming). The Create stream button creates the record.
- At the end the wizard offers two ways of broadcasting to the stream: from the FenomioStream Broadcaster broadcasting app, or from our own streaming software, into which we enter the streaming server address and the stream key.